
Kitchen Organization Ideas That Actually Work (and Look Crazy Chic)
Your kitchen can be gorgeous and functional—promise. If hunting for cumin feels like a full-body workout or your Tupperware drawer triggers mild rage, these ideas will save your sanity. We’re talking simple moves with big payoffs, clean lines, and storage that actually keeps up with real life.
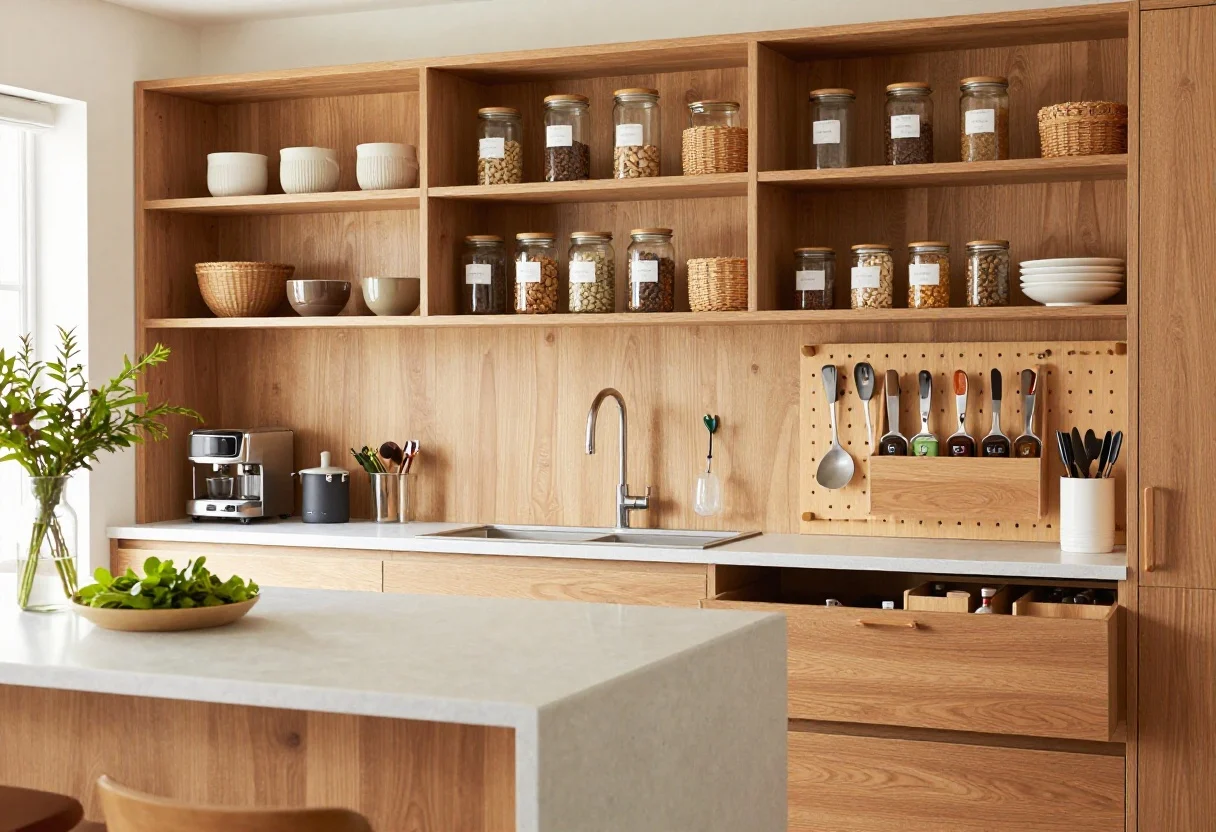
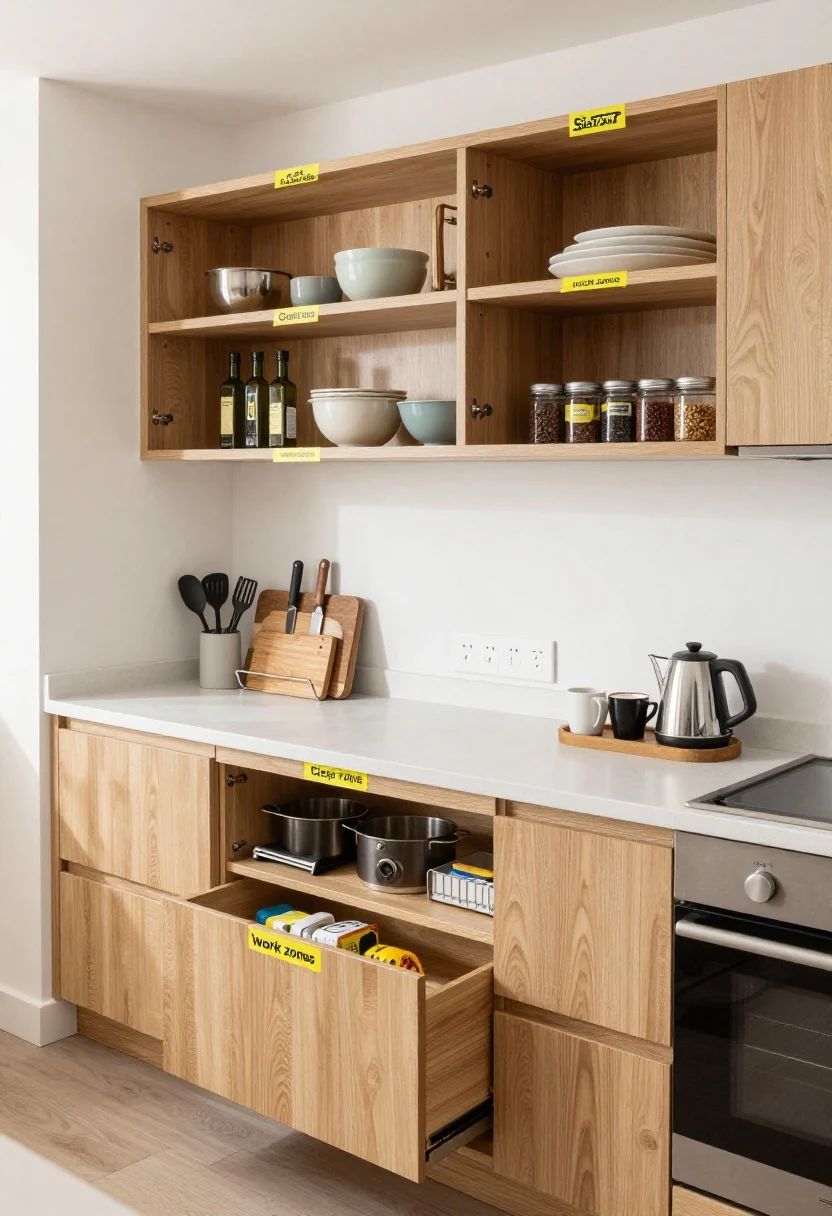
1. Create “Work Zones” So Everything Has a Job
© 2025 AI Illustrator — Inspiration Only
Think like a restaurant: set up zones for prepping, cooking, coffee, and cleanup. Keep tools where you use them so you’re not sprinting across the kitchen mid-sauté. It’s not just practical—it makes your counters feel calmer instantly.
Which Home Style Fits Your Space?
Answer 5 quick questions to find your perfect interior style and inspiration.
How to set it up
- Prep Zone: Cutting boards, knives, mixing bowls, and oils near the biggest counter run.
- Cooking Zone: Pots, pans, spatulas, and spices near the range or cooktop.
- Coffee/Tea Zone: Mugs, beans, filters, kettle by an outlet. Bonus points for a small tray.
- Cleanup Zone: Dish soap, scrubbers, trash bags, and towels by the sink or dishwasher.
Label shelves inside the cabinets to teach everyone the system. FYI: a sharpie and painter’s tape work fine for a trial run.
What to shop for: Drawer dividers, utensil crocks, spice racks, small trays.
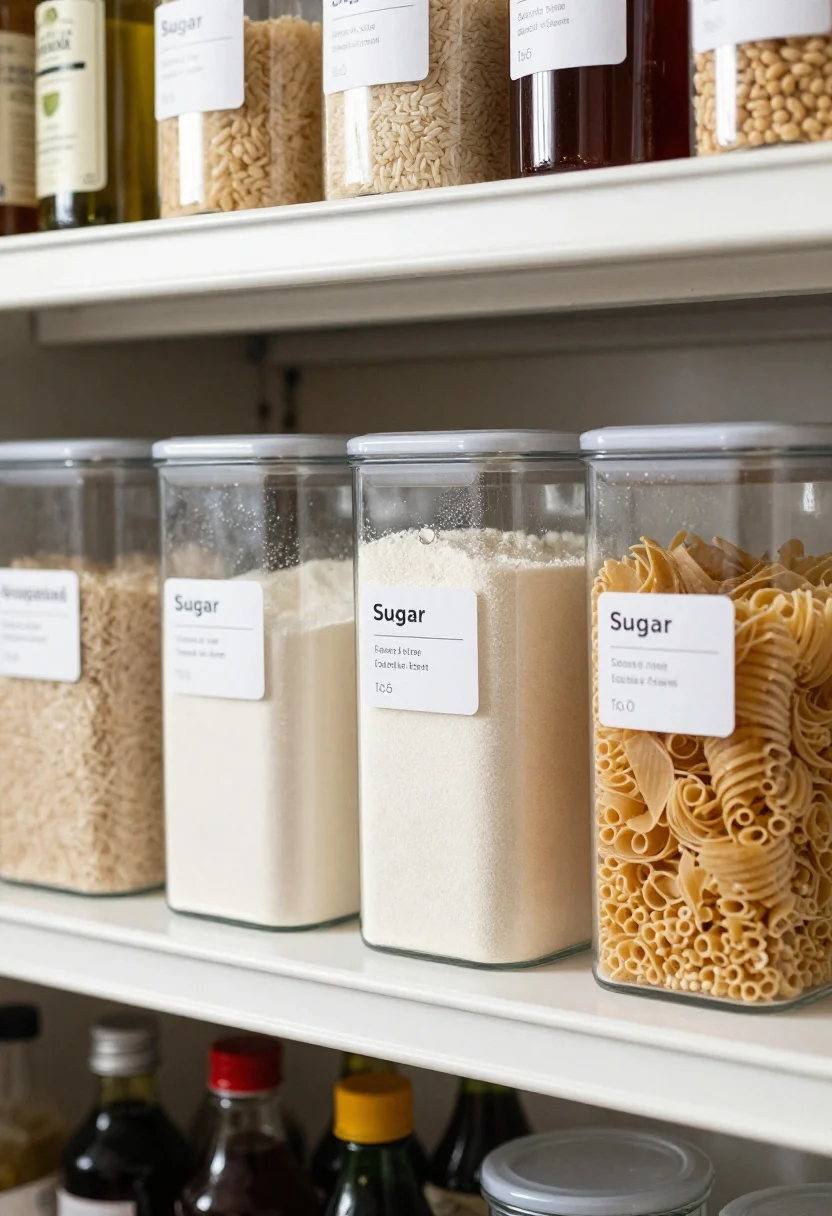
2. Decant Dry Goods Like a Minimalist (But Make It Practical)
© 2025 AI Illustrator — Inspiration Only
Decanting isn’t just an Instagram moment—it keeps food fresh and lets you spot what you’re low on. Use clear, airtight containers for staples you reach for weekly. Keep the bulky, rarely used stuff in original packaging elsewhere.
Smart decanting rules
- Choose uniform containers so they stack and slide easily.
- Use simple labels with the item name and cook time (paste from the box if needed).
- Reserve a shelf for backstock so you’re never out of pasta on a Thursday night.
Bonus: decant snacks at kid height to reduce the eternal “Where are the crackers?” conversation.
What to shop for: Airtight canisters, label maker or reusable labels, turntables.
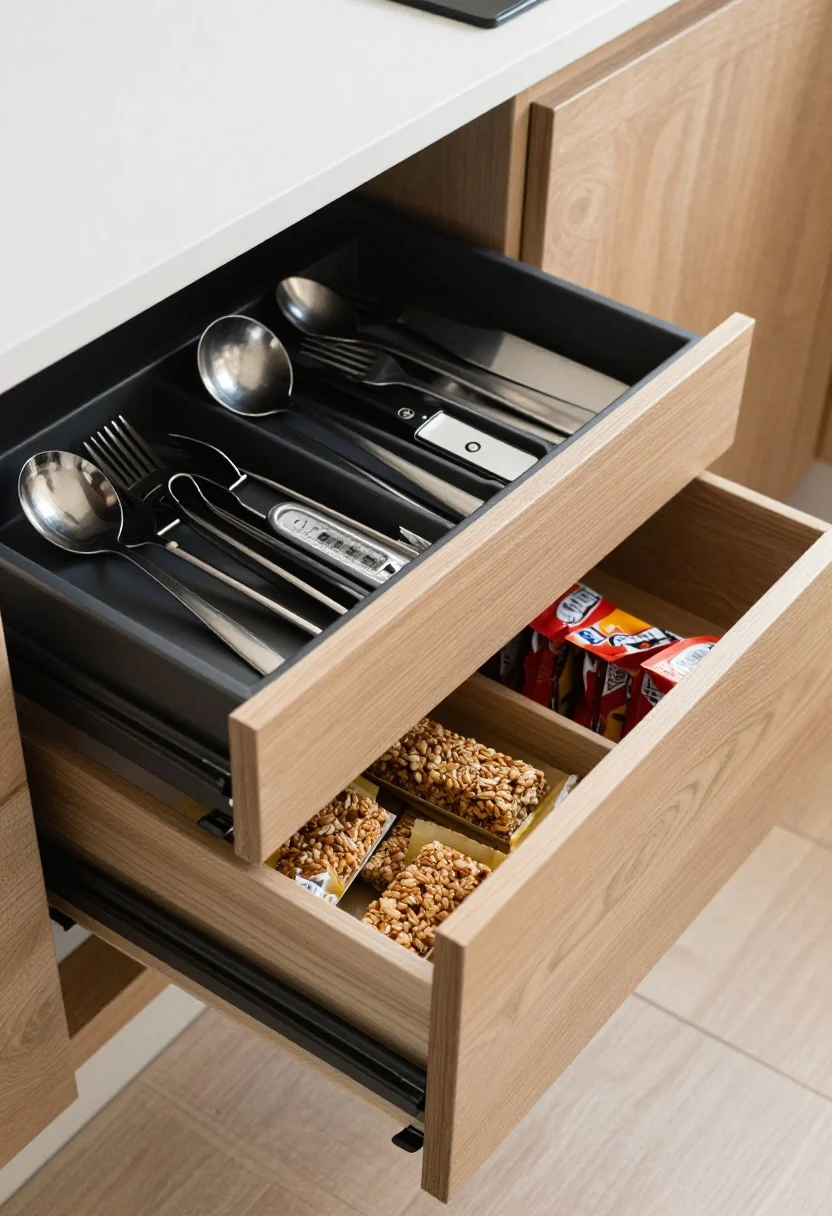
3. Upgrade Drawers With Inserts That Fit Your Life
© 2025 AI Illustrator — Inspiration Only
Drawers are the VIPs of kitchen storage, but only if they’re tailored. Generic catch-alls breed chaos; custom-ish inserts keep everything tight and tidy. Treat each drawer like a curated kit.
Drawer-by-drawer ideas
- Top utensil drawer: Adjustable organizers for forks, spoons, and knives.
- Cooking tools: Deep dividers for ladles, tongs, peelers, and thermometers.
- Knife storage: In-drawer knife blocks keep blades safe and counters clear.
- Snack drawer: Narrow bins so granola bars and pouches stop playing hide-and-seek.
Measure the interior first. Then you can mix and match inserts like a pro and avoid the dreaded 1-inch gap that collects crumbs.
What to shop for: Adjustable drawer organizers, in-drawer knife blocks, shallow bins.
4. Make Vertical Space Work Harder (Walls, Sides, And Inside Doors)
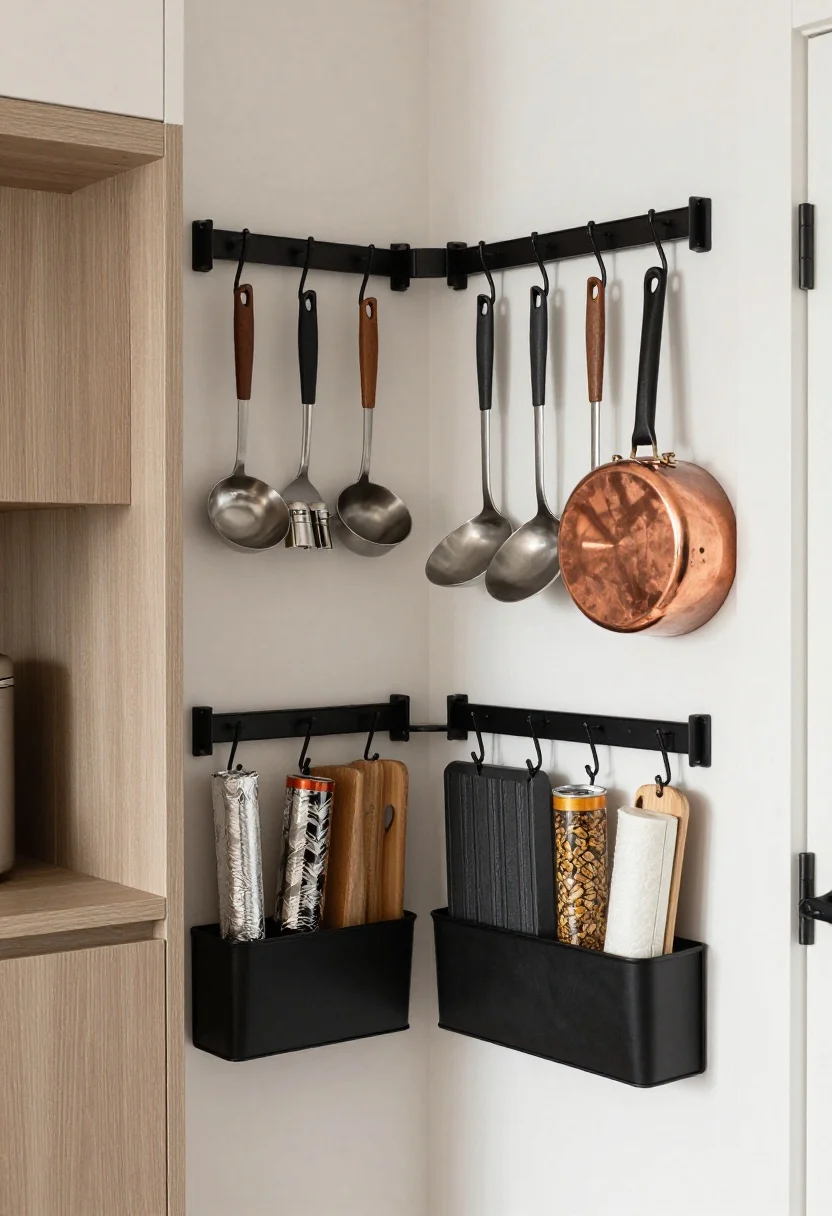
© 2025 AI Illustrator — Inspiration Only
When floor and counter space are maxed, think vertical. Walls and cabinet sides are basically storage real estate you haven’t tapped—yet. And yes, it can still look sleek.
High-impact moves
- Wall rails with hooks: Hang ladles, measuring cups, and small pots. It’s kitchen jewelry.
- Magnetic strips: Mount for knives or metal spice tins—clean, safe, and very gallery wall vibes.
- Inside-cabinet racks: Stash cutting boards, wraps, and lids on the door to clear shelves.
- Under-shelf baskets: Slide into existing cabinets to double short shelves.
Keep it curated. Display your prettiest pieces and hide the chaotic ones inside cabinets. A little editing = a lot of polish.
What to shop for: Rail systems, magnetic knife strips, over-the-door racks, under-shelf baskets.
5. Tame the Pantry With Zones, Bins, and “First In, First Out”
Pantries get messy because everything blends into the same beige chaos. Fix it with clear categories and containers that slide out. If you can see it, you’ll use it—wild concept, right?
Build a pantry map
- Eye level: Everyday items—cereal, snacks, rice, pasta.
- Upper shelves: Backstock, baking supplies, entertaining extras.
- Lower shelves: Heavy stuff—appliances, bulk oils, seltzer cases.
Use the FIFO rule (First In, First Out): newer items go behind older ones so nothing expires in the void. Add a lazy Susan for oils and sauces, and label bins clearly so the system survives roommates, kids, and late-night snacking.
What to shop for: Clear bins, lazy Susans, tiered shelf risers, can organizers.
Which Living Room Color Palette Fits You Best?
Discover the palette that reflects your style — take our free quick quiz and get instant decor inspiration!
Take the Quiz Now6. Solve the Pots, Pans, and Lids Disaster (Once and For All)
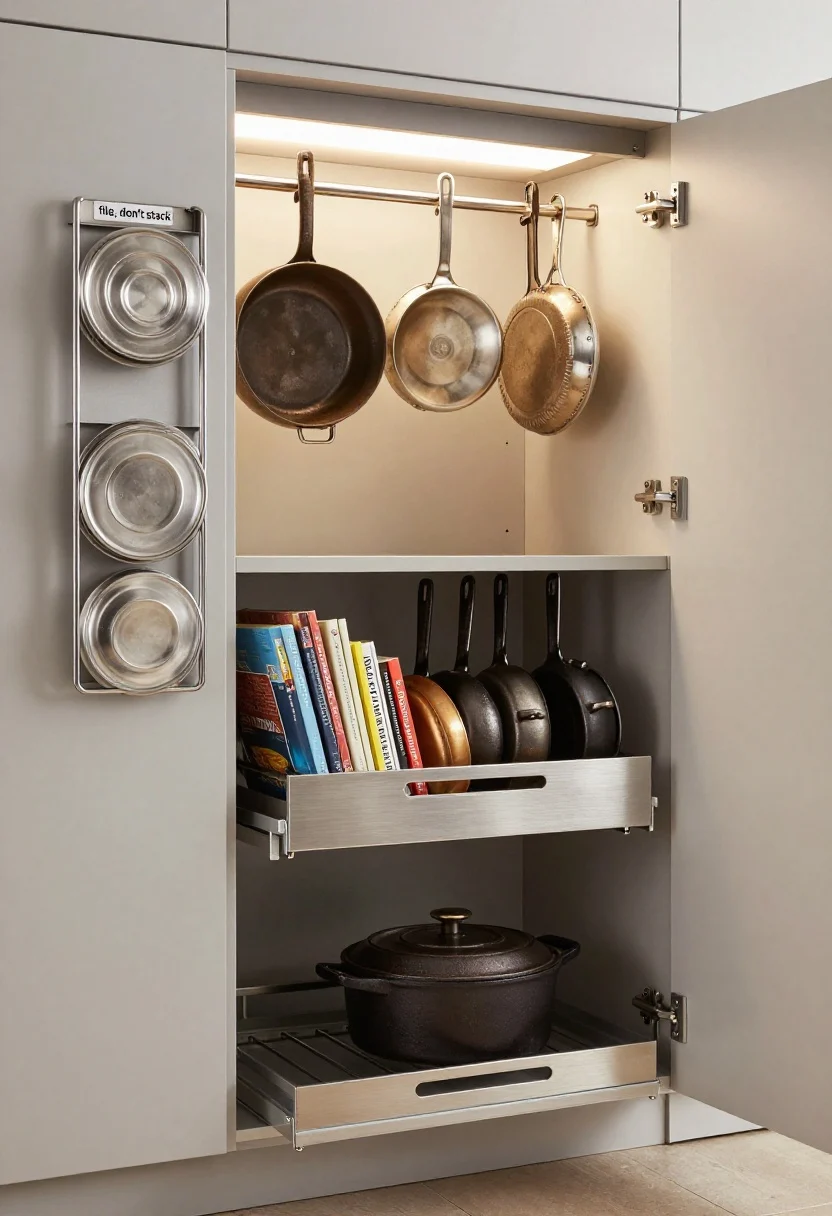
© 2025 AI Illustrator — Inspiration Only
No more clanging pot towers at 6 a.m. Give cookware a real home with vertical storage and smart stacking. Hint: your lids want their own corral.
Storage strategies that stick
- File, don’t stack: Use vertical racks so pans slide out like books—no Jenga.
- Lid organizers: Door-mounted or pull-out racks keep sizes visible and reachable.
- Heavy hitters low: Dutch ovens and cast iron live in the lowest cabinet or a sturdy pull-out.
- Hang what’s pretty: A small pot rail over the range looks editorial and saves space.
Keep only what you actually use. If two skillets are basically twins, choose the one that sparks joy (and actually browns food evenly, IMO).
What to shop for: Pan racks, lid organizers, pull-out cabinet shelves, pot rails.
7. Give the Fridge a Weekly Reset (It’s a 15-Minute Miracle)
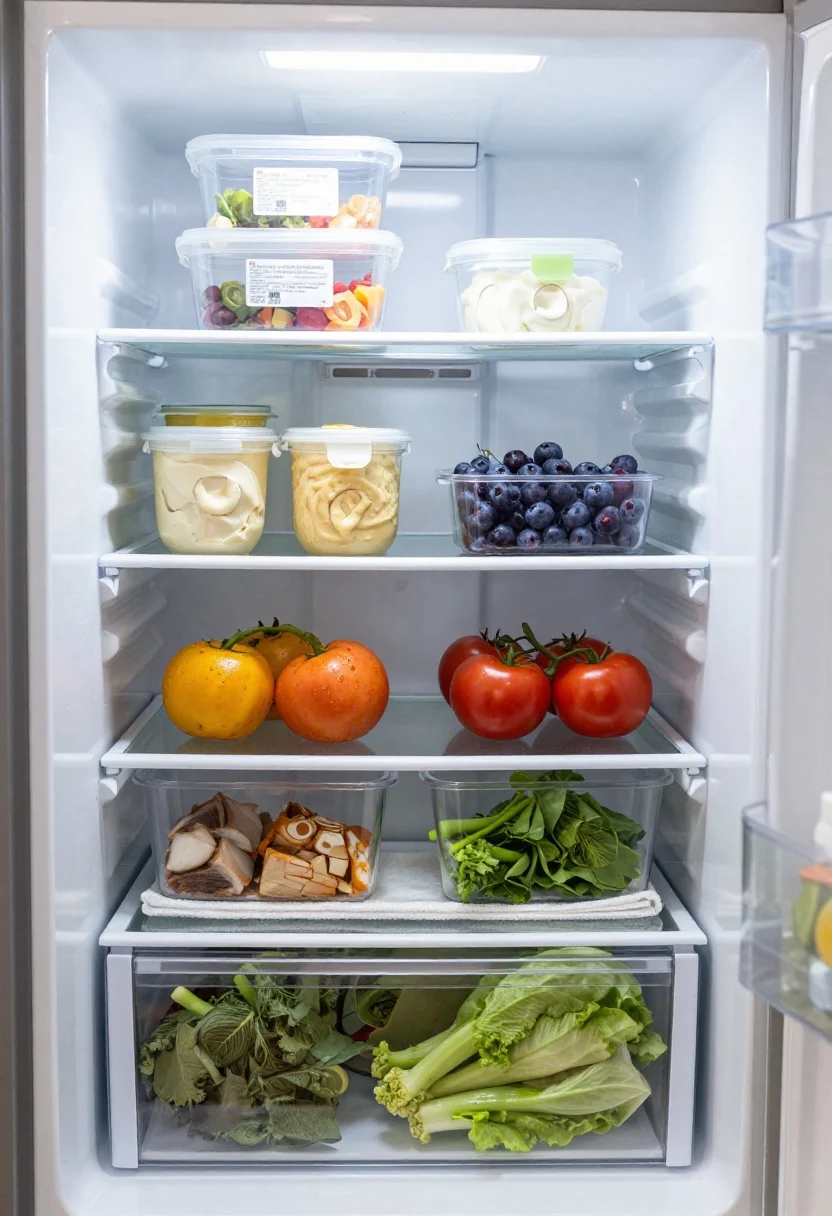
© 2025 AI Illustrator — Inspiration Only
A tidy fridge makes you feel like you have your life together—even if you ate popcorn for dinner. A quick weekly reset keeps waste down and meal prep easy.
The 15-minute routine
- Top shelf: Leftovers with dates on them. If it’s fuzzy, it’s gone.
- Middle shelves: Ready-to-eat items—yogurt, hummus, washed fruit.
- Lower shelves: Meal components—marinated proteins, chopped veg in clear bins.
- Door: Condiments only (the warmest spot). Milk and eggs deserve the interior.
- Crispers: One for greens, one for hardy veg. Line with a towel to catch moisture.
Corral sauces and jars on a turntable so you can actually reach the soy sauce without moving six things. Label a bin “Eat First” and watch leftovers magically disappear.
What to shop for: Clear fridge bins, turntables, date labels, produce savers.
8. Style Your Counters With Purpose (Clutter-Free, But Not Soulless)
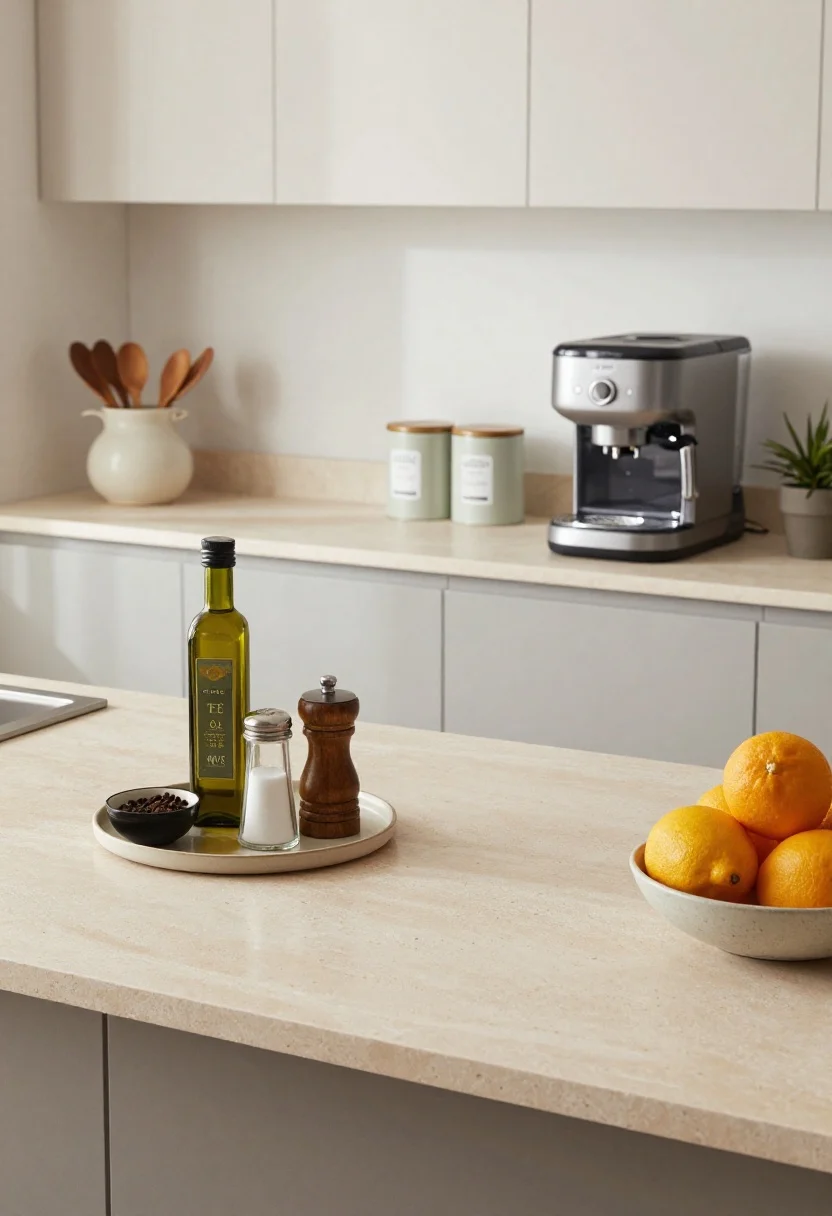
© 2025 AI Illustrator — Inspiration Only
Clear counters = instant calm, but we still live here, right? Keep only the daily-use items out, and make them look intentional. This is where function meets “ooh, cute.”
Countertop styling that works hard
- Use trays: Group oil, salt cellar, and pepper mill on a tray for a styled vignette that’s easy to wipe.
- Pretty canisters: Coffee, tea, or wooden spoons in a ceramic jar = useful decor.
- Appliance audit: Out: toaster, coffee maker, maybe the blender. In cabinets: the once-a-month gadgets.
- Fresh element: A small plant or bowl of citrus makes the whole room feel alive.
Edit ruthlessly. If it doesn’t earn its keep daily, it lives behind a door. FYI: one open space of counter is non-negotiable—it becomes your default prep zone.
What to shop for: Trays, ceramic crocks, canisters, small planters.
Quick Wins You Can Do Today
- Label two shelves and move items into their zones.
- Decant just three staples you use most.
- Add one lazy Susan to the pantry or fridge door shelf.
- Buy a lid organizer and free an entire cabinet in 10 minutes.
The bottom line: When your kitchen has zones, containers that fit, and a couple of simple routines, it practically runs itself. You’ll cook more, waste less, and—dare we say—enjoy being in there.
FAQ
Q: How do I organize a tiny kitchen without adding cabinets?
A: Go vertical with rails and magnetic strips, use inside-door racks, and swap stacks for file-style storage. Prioritize daily-use items and store seasonal pieces elsewhere.
Q: Is decanting really worth it if I’m busy?
A: Yes—decant only high-traffic staples. It reduces duplicates, speeds up cooking, and keeps shelves cleaner. Start with flour, sugar, rice, and your top two snacks.
Q: How often should I reset the pantry and fridge?
A: Do a light weekly tidy (trash expired items, rezone wanderers) and a deeper reset monthly. Set a 15-minute timer so it never becomes a Sunday marathon.
Shop the Look on Amazon
Disclosure: As an Amazon Associate, this site may earn from qualifying purchases.
These product categories fit this article and give readers an easy next step when they are ready to shop.
- Drawer inserts — Tailors utensil and tool drawers to reduce clutter
- Food storage — Keeps staples fresh and easy to see
- Wall storage — Uses vertical space and frees counter area
- Pantry bins — Create zones and slide out for visibility
- Cookware organizers — File-style storage ends pot and lid chaos