
Kitchen Storage Hacks You Wish You Knew Sooner (and Will Use Forever)
Let’s be honest: most kitchens aren’t short on charm—they’re short on space. If your cabinets are packed like a suspicious carry-on and your countertops are doing the most, you’re in the right place. These kitchen storage hacks you wish you knew sooner aren’t gimmicks; they’re game-changers you can actually do this weekend.
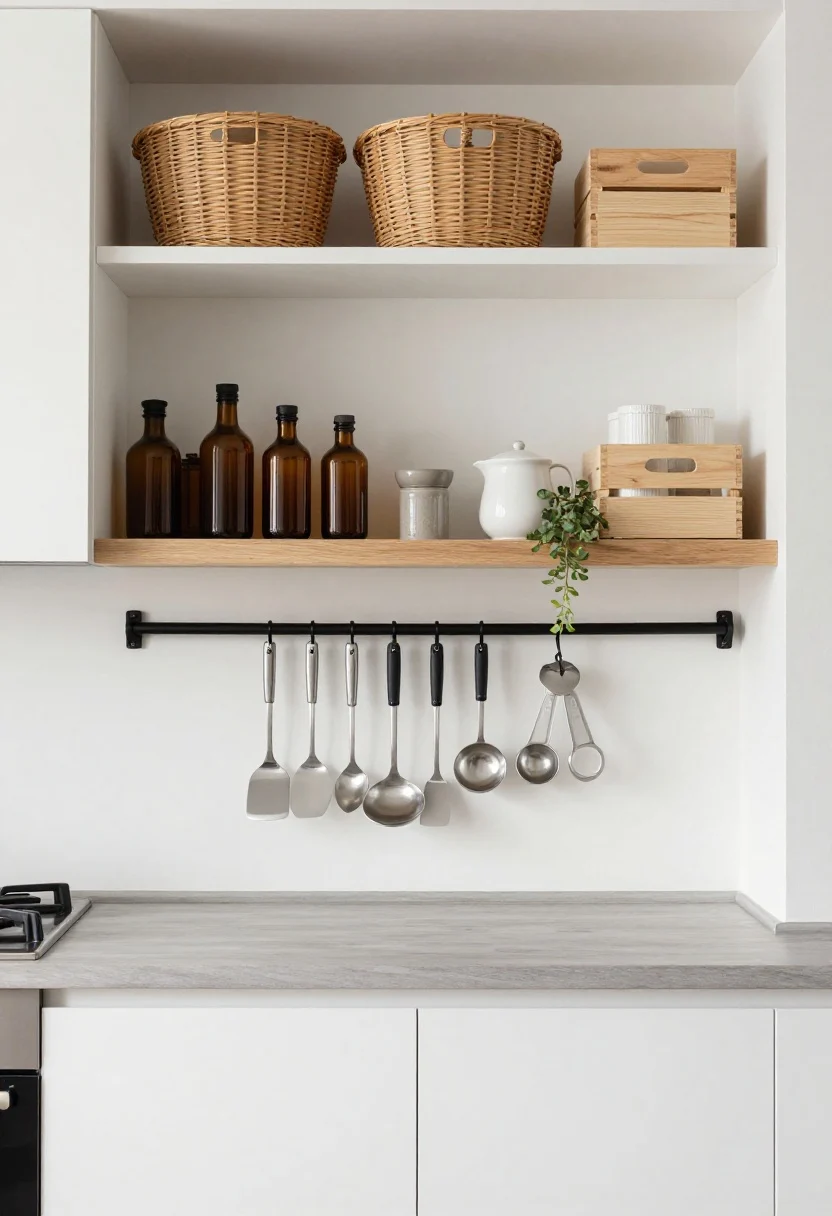
1. Go Vertical, Then Go Higher
© 2025 AI Illustrator — Inspiration Only
Your walls and the dead space above your cabinets are basically untapped real estate. The trick is to use them without making your kitchen look like a garage sale. Keep it cohesive, keep it airy, and store intentionally.
Which Home Style Fits Your Space?
Answer 5 quick questions to find your perfect interior style and inspiration.
How to Pull It Off
- Install slim rails or pegboards: Hang frequently used tools—think spatulas, ladles, and measuring cups. Group by function so you’re not playing Where’s Waldo mid-recipe.
- Add a shelf above the sink or stove: Perfect for oils, salts, and a small plant that says “I have my life together.” Use matching bottles for a clean look.
- Use the top of cabinets: Stash lesser-used gear in lidded baskets or wood crates. It hides the clutter and adds texture.
Pro tip: Keep vertical storage at or above eye level lightweight—no cast iron chandeliers, please.
What to shop for: wall-mounted rails, pegboards, floating shelves, lidded baskets.
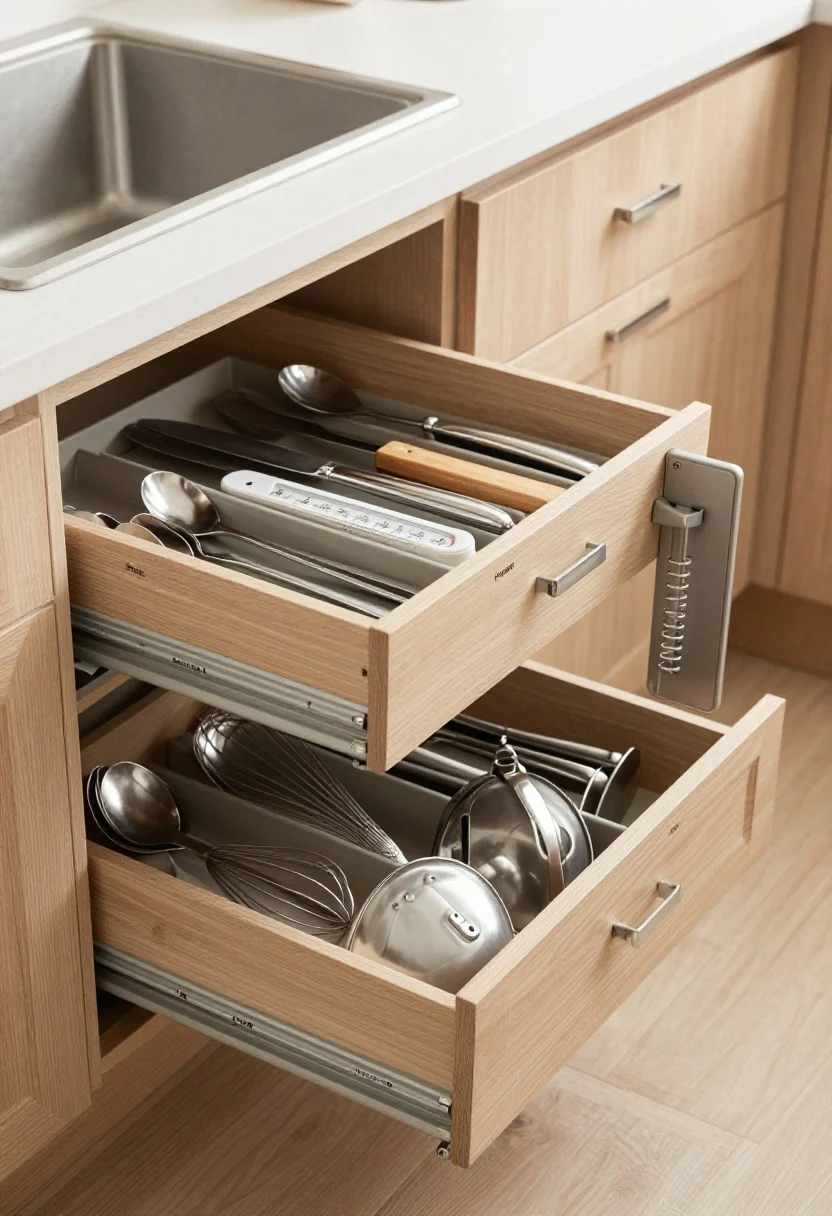
2. Double-Duty Drawers (Hello, Hidden Zones)
© 2025 AI Illustrator — Inspiration Only
Drawers are MVPs when they’re organized with purpose. The goal: less rummaging, more “found it instantly” energy.
Drawer Strategies That Actually Work
- Tiered inserts: Stack a shallow organizer over deeper compartments. Utensils glide on top; bulky whisks and thermometers rest below. It’s like a secret mezzanine for cutlery.
- Knife blocks inside drawers: Clears counter space and protects blades. Plus, no more menacing knife magnets if that’s not your vibe.
- Adjustable dividers: Make zones for baking, prep, and lunch gear. Label the front lip inside the drawer so housemates stop “borrowing.”
FYI: Corral rogue lids with a spring-loaded divider on the far right; they’ll finally stop playing dominoes.
What to shop for: tiered drawer inserts, adjustable dividers, in-drawer knife blocks.
3. Shelf Space That Multiplies Overnight

© 2025 AI Illustrator — Inspiration Only
If your cabinets have the spatial planning of a sitcom closet, it’s time to finesse the shelves. We’re aiming for easy reach and zero stacking avalanches.
Cabinet Upgrades You’ll Love
- Risers for plates and mugs: Create two-level zones so you’re not stacking uneven towers. Group by color for a boutique-cafe moment.
- Pull-out trays: Transform deep, awkward shelves into drawers. Especially clutch for mixing bowls and small appliances.
- Door-mounted racks: Inside cabinet doors, store wraps, foils, cutting boards, and flat lids. Keep depth under 3 inches so doors close smoothly.
Design note: Keep visible shelves curated. Store everyday whites in front; tuck color and patterns behind for visual calm.
What to shop for: shelf risers, pull-out cabinet trays, door-mounted racks.
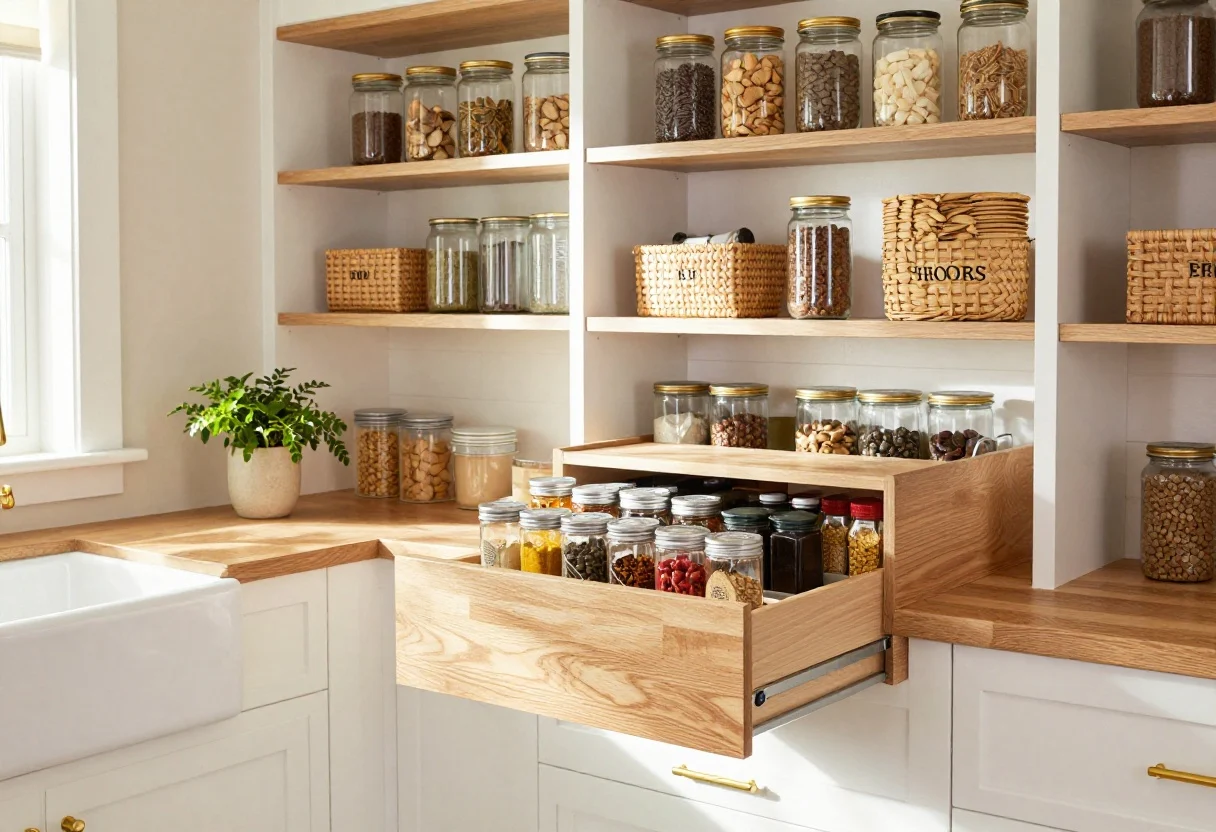
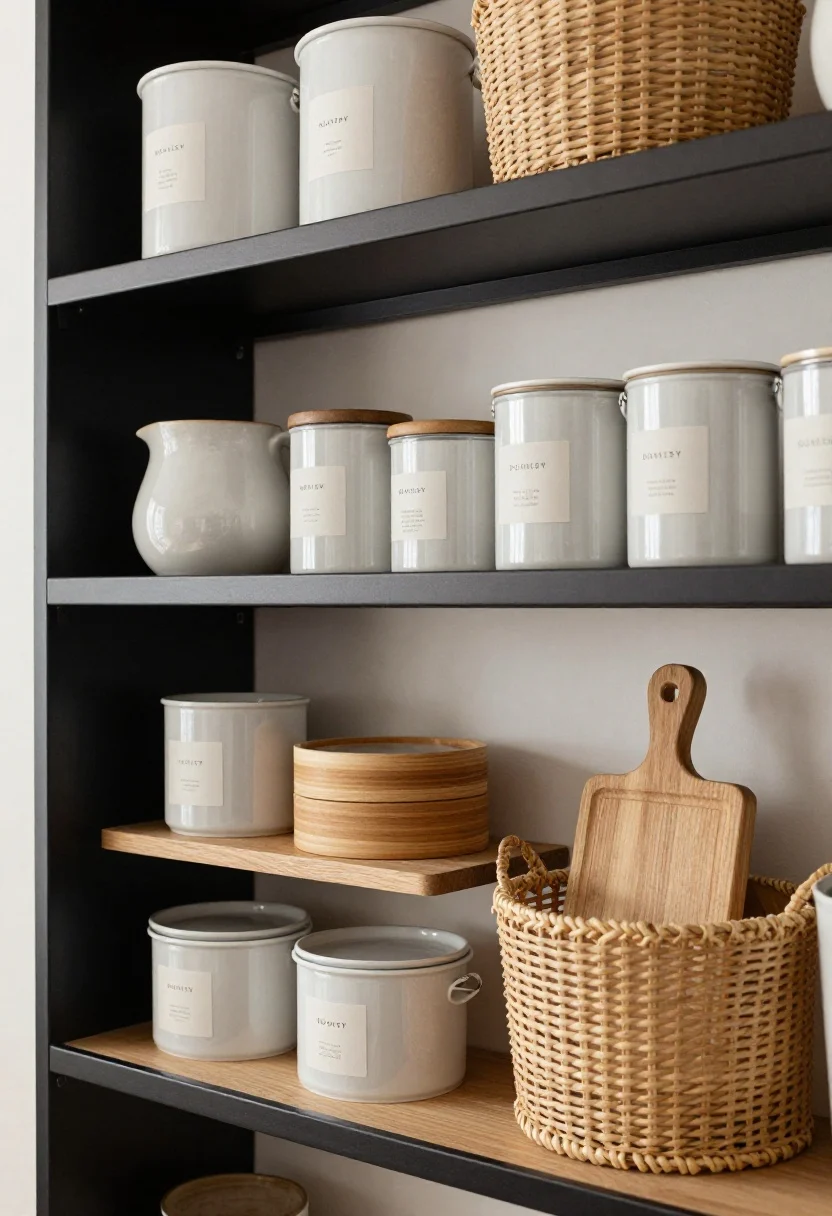
4. Pantries That Practically Organize Themselves
© 2025 AI Illustrator — Inspiration Only
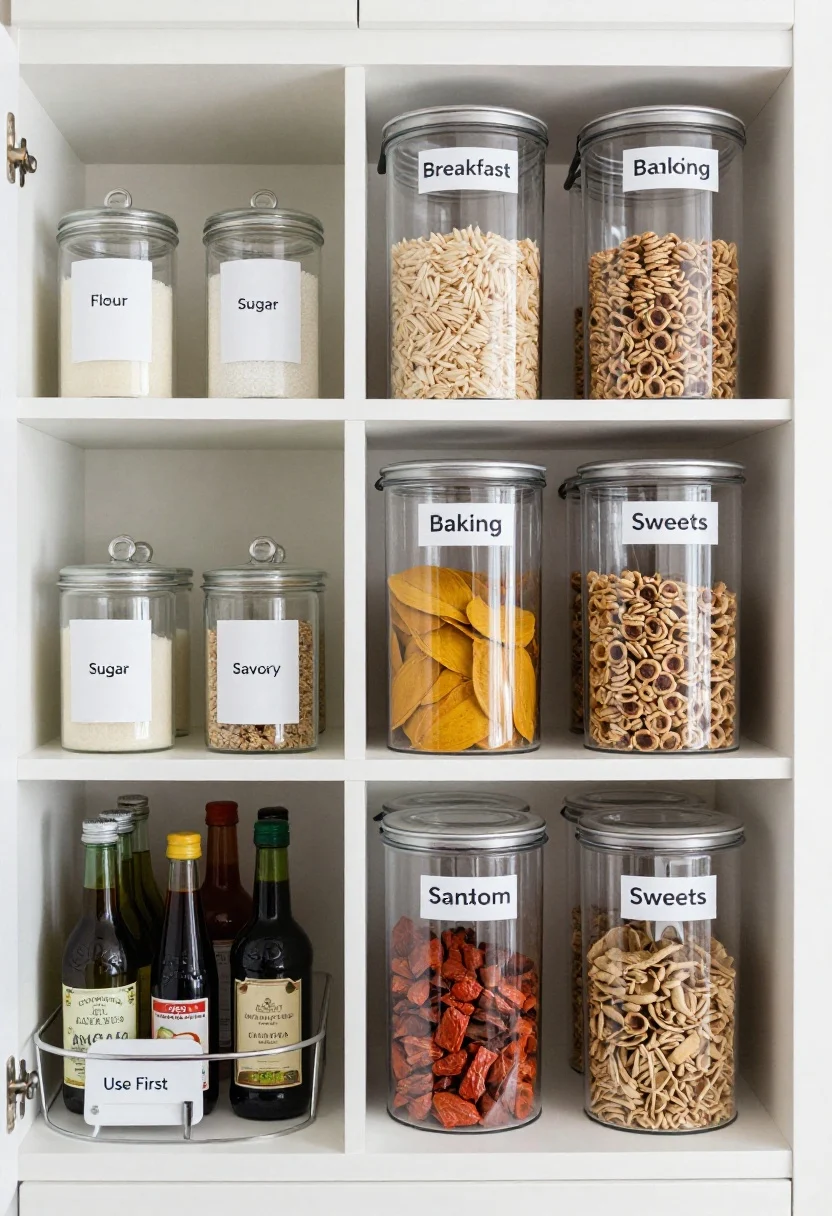
Yes, you can have the Pinterest pantry without the tears. The secret is zones, containers, and labels that even sleepy you can understand.
Set Up Smart Zones
- Decant selectively: Only for high-rotation items like flour, sugar, rice, and cereal. Use clear airtight canisters to see when you’re low.
- Lazy Susans for corners: Oils, vinegars, sauces—spin and grin. No more sauce graveyard in the back.
- Tall bins for snacks and packets: Stand pouches upright so nothing vanishes. Label fronts: Breakfast, Baking, Savory, Sweets. Color-coding helps, IMO.
- Tiered spice steps: Alphabetize if you’re extra; group by cuisine if you’re practical. Both are chef’s kiss.
Maintenance hack: Keep a slim “use first” bin for near-expiry foods. You’ll waste less and feel smug about it.
What to shop for: clear canisters, lazy Susans, tiered spice racks, tall pantry bins, labels.
5. Sneaky Under-Sink Control (No More Plastic Bag Avalanche)

© 2025 AI Illustrator — Inspiration Only
The under-sink zone has chaos energy. Let’s tame it with materials that can handle drips and still look pulled together.
Moisture-Proof Moves
- Install a drip tray: A shallow, waterproof mat under the pipes saves your cabinet base—and your mood.
- Stackable caddies: Group cleaning supplies by task: daily, deep clean, and extras. Slide-out bins keep it all accessible.
- Vertical tension rod: Hang spray bottles by their triggers to free up floor space. Feels wildly efficient.
- File your bags: Use a magazine holder or slim bin for foil, parchment, and zip bags. Label the spines like a mini library.
Quick win: Mount a small hook inside the door for dish gloves or a scrubbing brush. Tiny change, big sanity.
Which Living Room Color Palette Fits You Best?
Discover the palette that reflects your style — take our free quick quiz and get instant decor inspiration!
Take the Quiz NowWhat to shop for: under-sink mats, slide-out bins, tension rods, small hooks.
6. Small Appliance Park: Corral, Conceal, Command
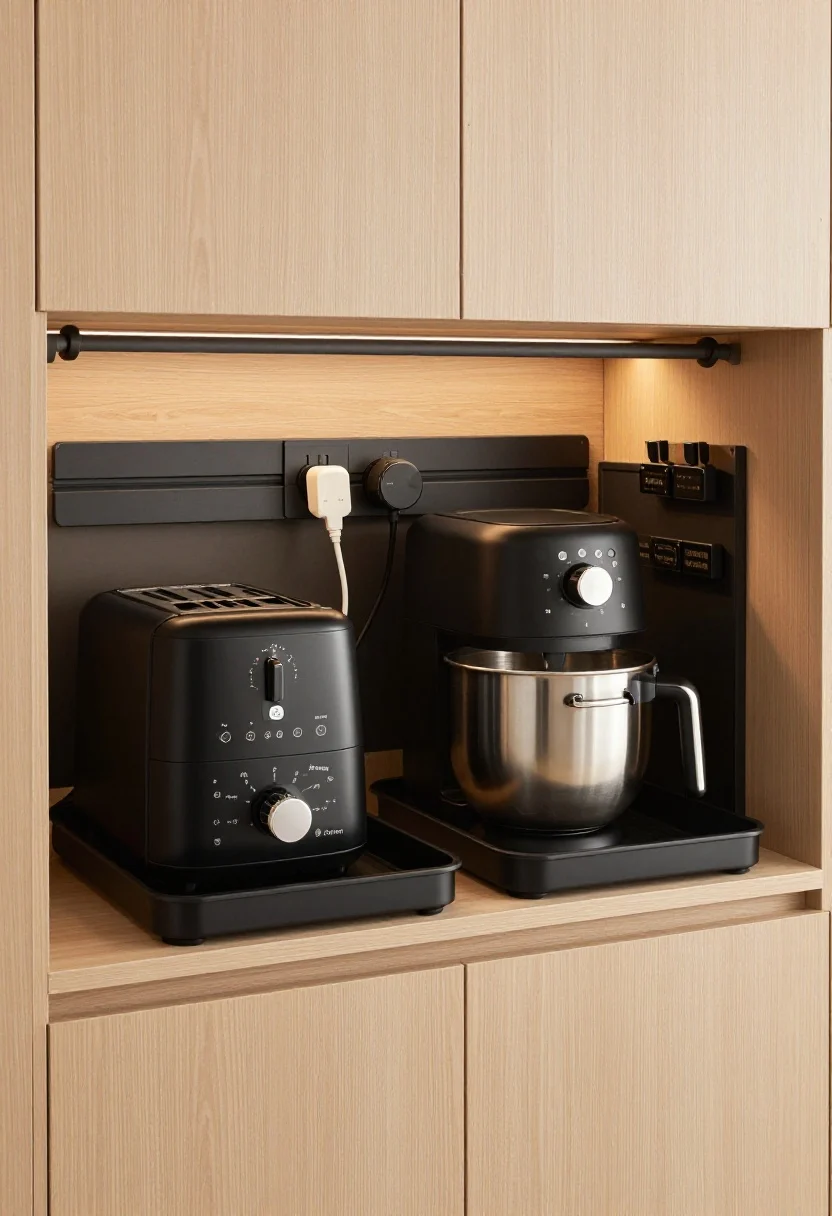
© 2025 AI Illustrator — Inspiration Only
Blenders, toasters, air fryers—love them, hate seeing them. Create a “parking zone” that makes them easy to use without living on your counters 24/7.
Appliance Management That Sticks
- Appliance garage: A lift-up or roll-top cabinet hides daily-use gadgets. Add an outlet inside so cords don’t snake everywhere.
- Tray system: Store midweight appliances on sturdy trays. Pull the whole tray out to use, slide it back when done—no heavy lugging.
- Cord wrangling: Attach adhesive cord winders to the backs. Label plugs if they share an outlet. You’ll never unplug the fridge “by accident” again, FYI.
- Seasonal rotation: Top-shelf the ice cream maker in winter; bring it down in summer. Same for slow cookers vs. grills.
Design detail: Match trays to your cabinet finish (wood, matte black, rattan) so open doors still look chic.
What to shop for: appliance garage kits, sturdy trays, cord winders, outlet strips with surge protection.
7. Islands, Carts, And Corners: The Secret Square Footage
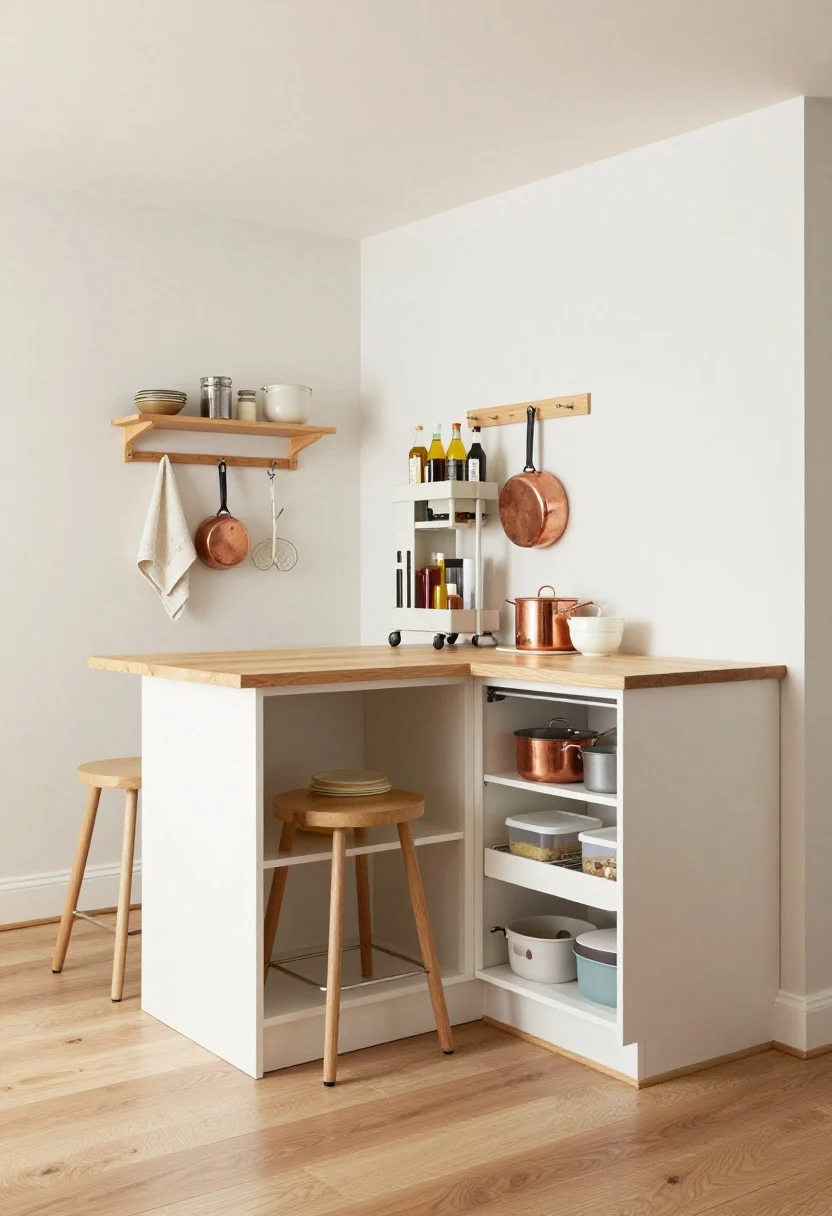
© 2025 AI Illustrator — Inspiration Only
When space is tight, think modular and mobile. Islands with storage, slim rolling carts, and corner solutions add capacity without renovations.
Max Out Every Odd Inch
- Storage island: Choose one with drawers on one side and shelves on the other. Add hooks at the ends for towels or pans. Overhang the top slightly for bonus seating.
- Rolling cart: Slide a slim cart between the fridge and wall. Stock it with oils, condiments, or baking supplies. Roll it out when cooking; tuck it away after.
- Corner carousel (a.k.a. lazy Susan cabinet): Swap dead corners for turntables or kidney-shaped pull-outs. Suddenly, pots and food storage containers behave.
- Toe-kick drawers: That space under base cabinets? It can hold baking sheets, cooling racks, and pet bowls like a secret lair.
Style move: Use matching hardware and finishes across carts, islands, and shelves so your add-ons feel intentional, not random.
What to shop for: kitchen islands with storage, rolling carts, corner pull-outs, toe-kick drawer kits.
Quick Styling Notes To Make It Pretty
- Repeat materials: Echo one texture—matte black metal, warm oak, or natural rattan—so all the storage feels cohesive.
- Curate the visible: Keep everyday items out and good-looking (ceramic canisters, wooden boards), hide the visually noisy stuff.
- Label like a designer: Minimal fonts, clear labels, and consistent containers elevate everything by 200%—scientifically unproven, emotionally accurate.
Conclusion
© 2025 AI Illustrator — Inspiration Only
Your kitchen doesn’t need more space—it needs smarter space. Start with one zone (drawers or pantry), set up systems you can maintain half-asleep, and let the calm ripple out. Soon you’ll be that person who opens a cabinet and nothing falls out. Wild.
FAQ
Q: How do I keep my kitchen organized long-term?
A: Give everything a home, label it, and do a five-minute reset at night. Keep a “backstock” bin so extras don’t creep into daily zones.
Q: What if I rent and can’t drill into walls?
A: Use adhesive hooks, over-the-door racks, tension rods, and freestanding shelves. Opt for carts and trays that move with you.
Q: How do I make open storage look intentional, not cluttered?
A: Limit the palette to 2–3 materials, decant the messy stuff, and group items by height and function. Leave negative space so the eye can breathe.
Shop the Look on Amazon
Disclosure: As an Amazon Associate, this site may earn from qualifying purchases.
These product categories fit this article and give readers an easy next step when they are ready to shop.
- Vertical storage — Hangs tools to free counters and use wall space.
- Drawer upgrade — Stacks utensil layers for faster access and less clutter.
- Deep shelf fix — Turns hard-to-reach shelves into smooth-sliding storage.
- Pantry decanting — Keeps staples visible, fresh, and easy to zone.
- Mobile storage — Adds flexible, slim storage for tight gaps and prep.
2 Comments
Comments are closed.