
Ingenious Layouts to Optimize Your Garage Workshop
(Or: How I finally stopped losing my measuring tape every two days.)
Our garage workshop used to be… let’s call it “functionally tragic.”
© 2025 AI Illustrator — Inspiration Only
Which Home Style Fits Your Space?
Answer 5 quick questions to find your perfect interior style and inspiration.
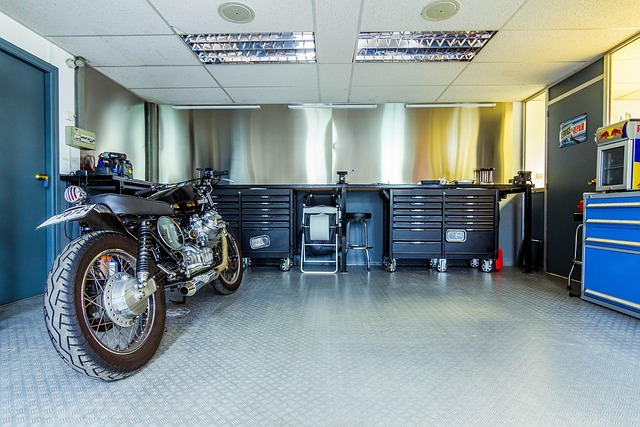
image by pixabay
Picture this: a sad folding table as my workbench, power tools tangled in a plastic bin, and screws scattered like confetti from a party I didn’t remember attending. Every time I started a project, I’d spend ages just finding stuff.
It got to a point where I’d rather not fix or build anything just to avoid the mess.
So one Saturday (after tripping over a circular saw again), I had a full-blown “this is not who I am anymore” moment and decided to revamp the garage workshop layout for good.
Here are the ingenious layout strategies that totally transformed my garage from chaotic mess to “ooh, is this a real workshop?” vibes — and made every DIY project way more doable.
Designate Specific Zones — and Actually Stick to Them
I used to have everything everywhere. Drill in one corner, sanding pads in a drawer in the kitchen (??), and clamps… who even knows.
So I mapped it out:
Workbench area (the sacred space)
Tool wall
Lumber and materials
Power tools & charging station
Paints, stains & finishing supplies
Hardware + tiny stuff zone
Having “zones” meant I didn’t just randomly shove things into drawers and hope I’d remember later. (Spoiler: I never did.)
Put Your Workbench in the Right Spot
The biggest game-changer? Putting the workbench center-ish, not shoved up against a wall where I couldn’t even swing a hammer properly.
Which Living Room Color Palette Fits You Best?
Discover the palette that reflects your style — take our free quick quiz and get instant decor inspiration!
Take the Quiz NowIf your space allows, leave plenty of room around your bench — especially behind it. You’ll thank yourself every time you’re cutting a long board or building something bulky.
Pro tip: Add locking caster wheels if you want to make it mobile. I roll mine out for messy jobs and then tuck it back in when I’m done. Genius.
Use Vertical Space Like You’re Playing Tetris
The garage walls are your best friend.
I added:
Pegboards (with outlines drawn so I know exactly where tools go — no excuses)
Magnetic strips for screwdrivers and wrenches
Wall-mounted bins for hardware, nails, etc.
Lumber rack up high to keep long boards off the floor
It freed up so much space and I can actually see all my tools now instead of digging through a tote labeled “random sharp stuff.”
Build a Charging Station You’ll Actually Use
Before: My cordless drill would die mid-project and the charger was tangled in a drawer under a pile of extension cords.
Now: I have a neat little wall-mounted shelf with outlets for all my battery chargers, hooks for cords, and labeled baskets for spare batteries.
It looks good, works better, and makes me feel way more professional than I actually am.
Add Rolling Carts for Mobile Projects
I picked up a rolling cart with drawers and shelves and I swear it became my new best friend.
When I’m working on something outside or in the driveway, I just wheel it out instead of making endless trips back inside for clamps, screws, and sandpaper.
Even better: when I’m done, I just roll it back and everything is still organized.
Drawer Storage for All the Tiny Chaos
I used to have a mason jar full of “miscellaneous screws” which is basically just saying, “I give up.”
Now I have a small drawer cabinet — you know those plastic ones with lots of tiny bins? Game. Changer.
I labeled them with everything from wood screws to wall anchors to random L-brackets. Suddenly, I’m not buying stuff I already own because I can actually find it.
Lighting Makes or Breaks Your Workflow
Let me say it louder for the people in the back: you need better lighting.
I replaced the sad single bulb overhead with:
A couple LED strip lights over the bench
A magnetic, moveable work light for detail jobs
A clamp-on spotlight for extra precision
It doesn’t just look better — it literally makes the work easier (and safer).
Use Foldable Features for Small Spaces
Don’t have much room? Foldable is your friend.
Try:
A fold-down workbench that mounts to the wall
Hinged tool storage that opens and closes like a cabinet
Wall-mounted extension cord reels (so you’re not constantly tripping)
These small tweaks made my tight garage feel way more spacious without sacrificing function.
Mount a DIY Project Board
I added a corkboard and dry-erase combo board to plan out projects, pin up measurements, and write reminders like “BUY MORE SANDPAPER.”
It helps keep my brain (and workflow) organized, and it’s oddly satisfying to cross things off once I’m done.
Leave a Clean-Up Zone (Even If It’s Tiny)
A broom, shop vac, and a trash can in the corner? Essential.
I carved out a little spot just for cleanup so I don’t constantly procrastinate sweeping until I’m knee-deep in sawdust. It keeps the space tidy and way more usable, which — let’s be honest — is half the battle.
Final Thoughts From the Once-Cluttered Garage Queen
Look, my garage workshop still gets messy when I’m deep into a project — I’m not pretending it’s Pinterest-perfect every day.
But now? Everything has a place, and cleaning up doesn’t feel like some epic emotional battle.
If you’re tired of the clutter and constant “where the heck did I put the wrench” panic, try one or two of these layout tricks. You don’t have to do it all at once. I sure didn’t.
But even a few smart layout upgrades can totally change how your garage workshop feels — and works.